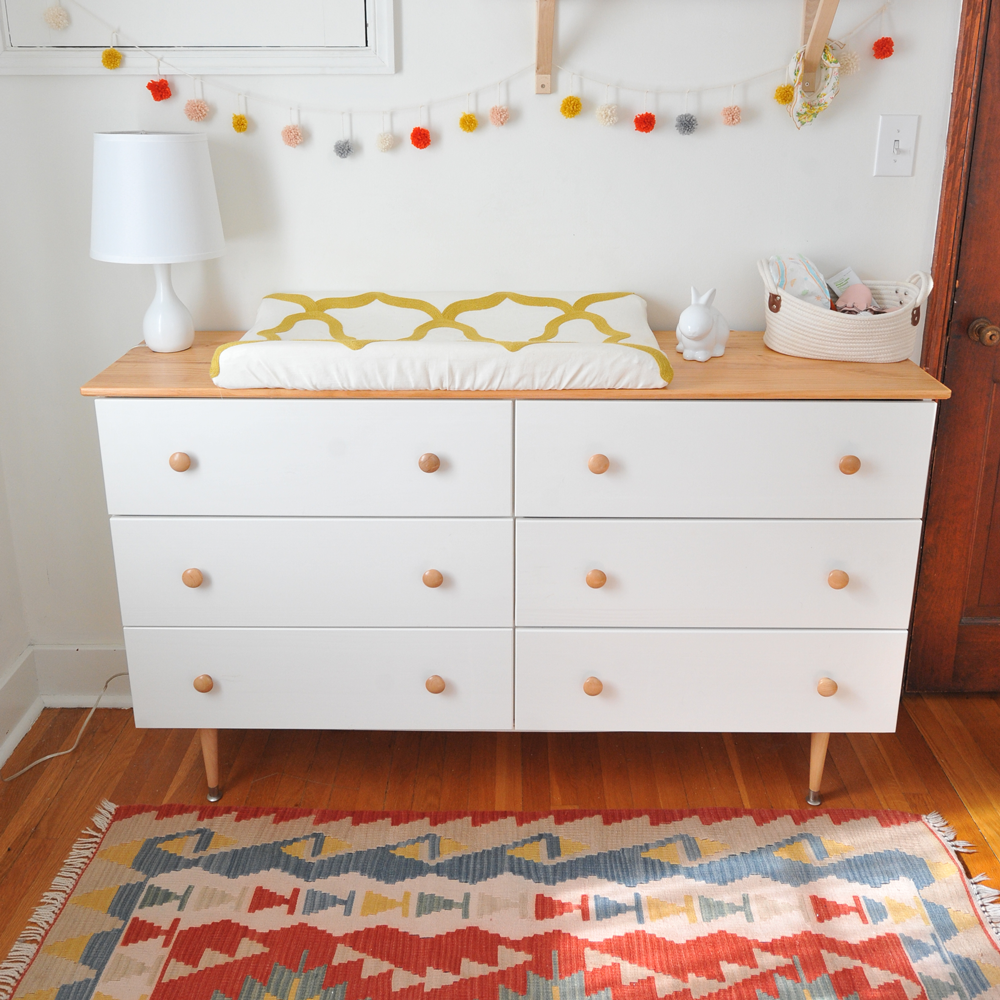
When I revealed Emerson's nursery a few months back, everyone kept asking how we DIY'ed the IKEA Tarva dresser in her room. So I'm finally getting around to laying out the step-by-step of how we did it!
The thing I really love about the Tarva is that it comes unfinished and is designed to be customized and jazzed up. I've seen several really awesome and inspired creations using the Tarva and I love that IKEA is creating products specifically for people who love customizing furniture.

See the full DIY after the jump!


See the full DIY after the jump!


What You'll Need
6 2-packs of Round Wood Cabinet Knobs
How We Did It
1. Assemble the dresser and leave the dresser drawers out. Give it all a light sanding (this isn't totally necessary, but I think the finish is nicer if you do).
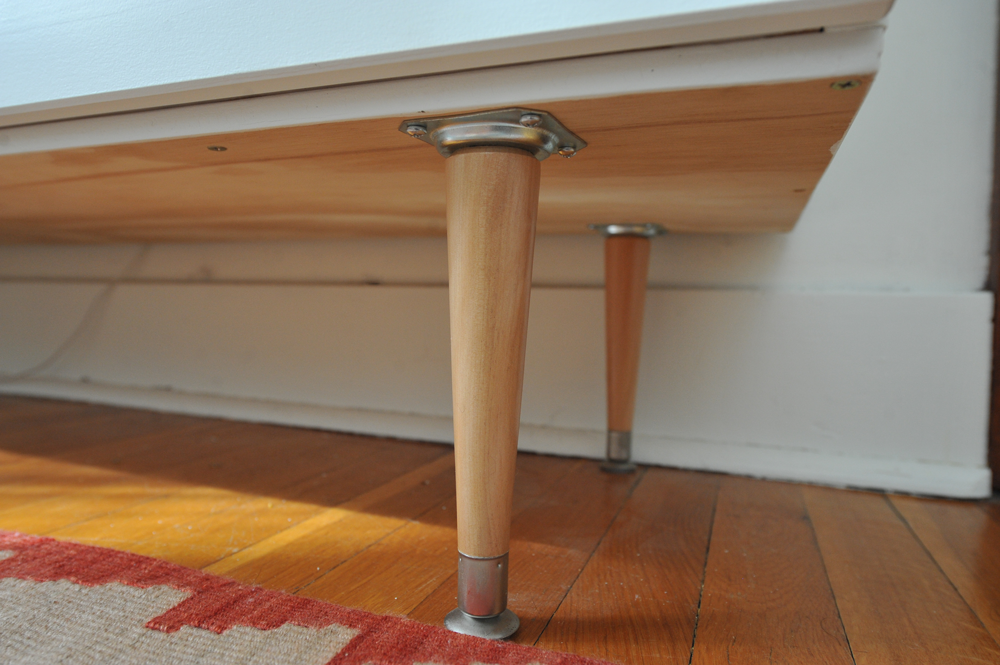
2. If you want to use tapered legs, cut a piece of high quality plywood into a 59"X14" rectangle to screw under the dresser. Attach is to the underside of the dresser using screws, placing them approx. every 10 inches.
2. If you want to use tapered legs, cut a piece of high quality plywood into a 59"X14" rectangle to screw under the dresser. Attach is to the underside of the dresser using screws, placing them approx. every 10 inches.
2. Paint one coat of CabinetCoat paint in Satin White on the dresser sides and drawers. Let it dry for 6-8 hours.
3. Paint another coat of CabinetCoat paint and let it fully dry/cure 24 hours.
4. In the meantime, stain the top of the dresser, the knobs and legs with Minwax Natural Wood Finish.
5. Once the wood pieces are the shade you like, cover them with several coats of clear Polyurethane (we used 4 coats), lightly sanding with a fine grit sandpaper in between each coat.
5. Once the wood pieces are the shade you like, cover them with several coats of clear Polyurethane (we used 4 coats), lightly sanding with a fine grit sandpaper in between each coat.
6. Using the hardware IKEA provides, attach this thing to your wall. Please just do it. ESPECIALLY if you're using in a nursery or have kids.
And here's our nursery tour that has all the sources listed of stuff we used in this room! And as always, let me know of any questions or any future DIY's you'd like to see in the comments!
And here's our nursery tour that has all the sources listed of stuff we used in this room! And as always, let me know of any questions or any future DIY's you'd like to see in the comments!

No comments:
Post a Comment