I really dig the reclaimed wood table look. I browsed a bit at Crate & Barrel and Restoration Hardware, but couldn't stomach the idea of dishing out upwards of $1,500 for a table. So Rich and I decided we would make our own this past weekend. With the right tools, this is easily a one day project. And for those of you that are drowning in long term home renovations, it's a breath of fresh air to start and finish a project in one day. The best part? It cost under $60 to make.
Materials:
- 3 pieces (cut in half) of 2x6x10ft Spruce-Pine-Fur Lumber = $19.89
- 1 piece (cut in three even pieces) 1x4x8ft Whitewood Super Strip = $1.99
- Minwax Wood Finish Stain in Provincial 211= $7.97
- 2 IKEA Lerberg Trestle, gray legs = $20.00
- Zinc Wood Screws 8 x 1 3/4 = $7.77
Tools:
- Saw (we used a handheld)
- DeWalt 5" Variable Speed Orbital Sander
- 3" Flat Utility brush for stain
- Old rags for wiping stain
An oversimplified description of the process: We went to our local Home Depot and carefully evaluated the lumber beams. Once we decided on the 2x6x10 beams for the table (we wanted it to be 5 ft. long) we laid them out on the floor to make sure we picked the least warped pieces. Then we had Home Depot cut the beams in half, giving us 6 pieces of wood. We also had them cut the 1x4x8ft beam into three even pieces to use a support beams underneath.
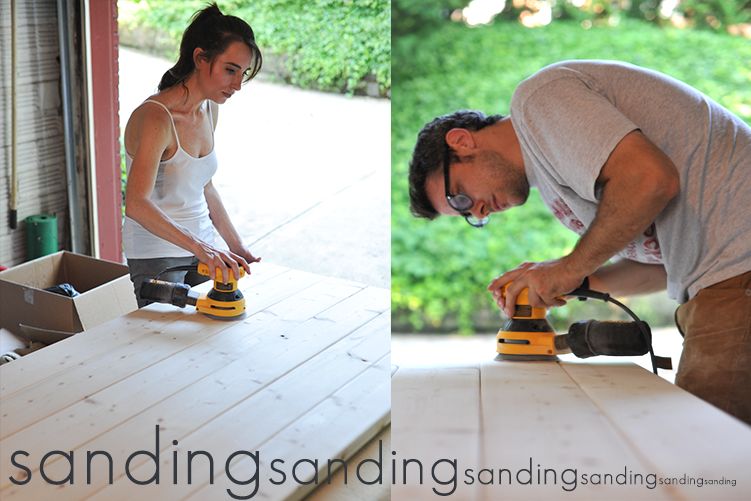
Once home, Rich and my dad measured, evened, and screwed the six 2x6ft pieces together, using the three 1x4 whitewood pieces as support beams. Then we sanded. And sanded some more. We used a 5 inch orbital sander with 80/150/220 grit attachments. After that, we wiped the dust off and brushed the stain on. The stain sat for 6 minutes. We wiped it off. The stained wood sat overnight and then we placed it on top of the IKEA legs. Once the stain really cures, we'll fasten the legs onto the table with a bracket.
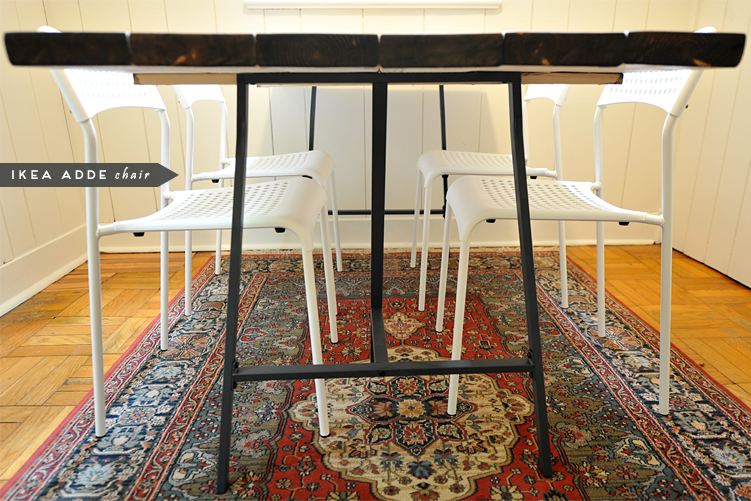
We're using white IKEA Adde chairs around the table. I really like the look of a white modern chair next to a reclaimed heavy-looking wood table. Maybe someday we'll splurge on Herman Miller's Eames chairs.
The dining room is still a work in progress. Once we finish it up, I'll post a before and after of the room.


looks amazing - can't believe you guys did this yourselves for $60. great job! (also, great to see the blog is back!)
ReplyDeleteGlad your blog is back in action! Following you in Mexico :)
ReplyDeleteVery good and interesting site with very good look and perfect information ... I like it.Kids Car Beds
ReplyDeleteThis comment has been removed by the author.
ReplyDeleteThis comment has been removed by a blog administrator.
ReplyDeleteThis comment has been removed by a blog administrator.
ReplyDeleteHi... Really this is a great post. I can see that you are putting lots of efforts into your blog. The way you are preparing the Reclaimed Tables really great. Great stuff, just great!
ReplyDeleteLove this table.
ReplyDeleteCan you share how the two outside pieces of 2" x 6" are mounted. It appears in the pictures that the firing strip stops short of reaching them and the trestle legs certainly don't reach the perimeter. We want to try to replicate your table!
Thanks
Thanks, R Jackman!
ReplyDeleteThe brace strip does extend approx. 4 inches over the two 6 inch outside boards. In retrospect, we should have beveled the two ends of the brace piece to make it a little more aesthetically pleasing. Good luck in your project, would love to see the end result.
Thanks for the reply, Erin.
ReplyDeleteAnd thx for tutoring me. I'm gonna give this project a whirl sometime in July and hopefully be proud enough to send you the pics!
PS - we're also considering building Kentucky Stick Chairs for the patio. You might wanna try 'em, too!
Thanks for sharing. I love most this kind of Blog. I, too, would love reclaimed wood shelves in our study and needed to know how to make them. There are more item of wood and wood institute. I love it very much. I need to know more about wood. So I am searching this kind of blog.
ReplyDeletereclaimed woods
Great post! Thanks for posting about wood dining tables. I am looking forward of reading more article with the similar topic as this one.
ReplyDeleteI am making this table today! thanks for the amazing design. what type of brackets did u use to attach the legs to the table? also what did u use the handheld saw for? Did u need to saw one end of the table? all 6 pieces are the same length except one is about 1/2 inch shorter.
ReplyDeleteTHANKS
Kim
Looks lovely... It always seems as though old styles come back in fashion, and a perfect example of the vintage becoming the modern is reclaimed wood floors and furniture. We are looking to get reclaimed wood block flooring in my house, I have reviwed The Reclaimed Flooring Co website for our help as they creates exceptional works of real, natural wood floors with an innovative range of hand-made platforms made in Oak, Pine, Strip, Panels & Parquet, etc. Thanks @Tristan
ReplyDeleteAwesome post! Thanks for sharing this valuable & informative information. I must say that you have done a commendable job with it! Keep it up!!
ReplyDeleteSofa Bed Hong Kong | Custom Made Furniture Hong Kong
How did you attach the Ikea legs to the table, what kind of brackets did you use?
ReplyDelete